
I’m currently doing the Pastel certificate course and have just completed my third set of exercises; one of these was to ‘create an imaginary landscape using frottage’. Put simply, in this case, frottage is the art of making rubbings of various textured surfaces using pastels. These rubbings can then be used to create images (by cutting) and pasted onto a surface to generate a picture.
Having looked around my house there didn’t seem to be many textured surfaces so I made a few of my own by scattering coarse sea salt and breadcrumbs on chopping boards and then using photocopy paper for the rubbing surface. I also used the few textured surfaces I could find.
In the first instance I used small pieces of paper (about A5) and tried to paste these onto heavy cartridge paper to create the landscape. Not a success!! I found the images too small and the surface buckled quite badly with the glue! Plus the rubbings were smearing as I tried to make them stick flat!!
So – I had a think – and started again!! This time I used larger pieces of photocopy paper (A4) so I could use different cuttings from the same ‘pattern’; I used stretched 140lb NOT watercolour paper and ‘fixed’ the rubbings before using them. Also, after checking with my tutor, I created a background and foreground using pan pastels – dampened to create washes of colour. In an attempt to lay some texture into these washes I tried using scrunched up clingfilm (works well on watercolour!) but in this case it didn’t do much at all.
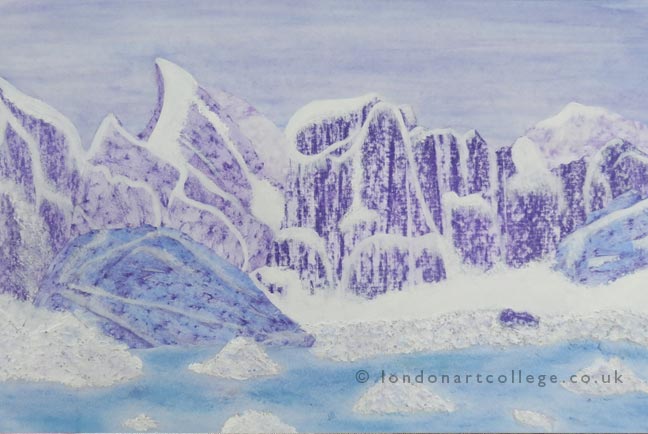
After looking at the rubbings I decided on a snowy, icy mountain landscape so I roughly sketched out the mountains and icebergs and then started cutting the rubbings into various shapes to create the landscape. I realised early on that it was best to lay the cuttings out to make the scene before pasting to make sure they worked together. Having decided on the layout I then pasted each cutting in.
However, the foreground was supposed to be covered with snow and icebergs and, at this stage was just a flat wash. So –in the spirit of experimentation, I used some texture paste to create the icebergs effectively lightly rubbing some pale lilac and pale blue soft pastel across to try and achieve an appropriate iceberg look. Sadly, when dried the textured area looked a horrible grey colour!
After a bit of playing about with the texture paste, white acrylic, gouache, a toothbrush and some acrylic brushes I decided that the best way to achieve the icebergs and snow was to use the white acrylic. I simply painted over the texture paste and added touches of pale lilac and blue using the toothbrush dipped into the pan pastels.
For the snow I painted in ‘runs’ of white to create snow, generally using the lay of the rubbings to get a reasonable effect. I used a roughly chopped off acrylic brush along with the toothbrush to achieve the scattered effect.
Then not being happy with the rather insipid sea I used purple and blue soft pastels to make it look rougher. Pleased with the finished picture and my tutor liked it as well!!
All in all interesting learning process!
Jane Tivey
Pastel Painting Course