

Learning to draw with coloured pencils is incredibly rewarding, but like any medium, it has its quirks. Whether you are just starting out or finding your progress a bit patchy, this guide walks you through 5 common mistakes and how to fix them.
These tips come directly from our tutors on the Coloured Pencil Drawing Certificate Course and are based on real feedback we give students every day.
Mistake 1: Pressing Too Hard Too Early
What happens:
You lay down bold colour straight away but the tooth of the paper flattens, and you can’t blend or layer anything on top.
Fix it:
Start with light layers. Think of it like building up a watercolour your first layers should feel whisper-light. Add pressure gradually, saving stronger strokes for final shading and contrast.
Tip: Try holding your pencil further back for softer control. Take a look at the video below which might help you further.
Mistake 2: Not Enough Layers
What happens:
Your drawing looks patchy or too pale, even though the colours looked right in your pencil set.
Fix it:
Coloured pencils need multiple passes to build richness. Try layering complementary colours (like blue over orange) to boost depth. Aim for at least 3–4 layers in most areas, sometimes more for darker tones.
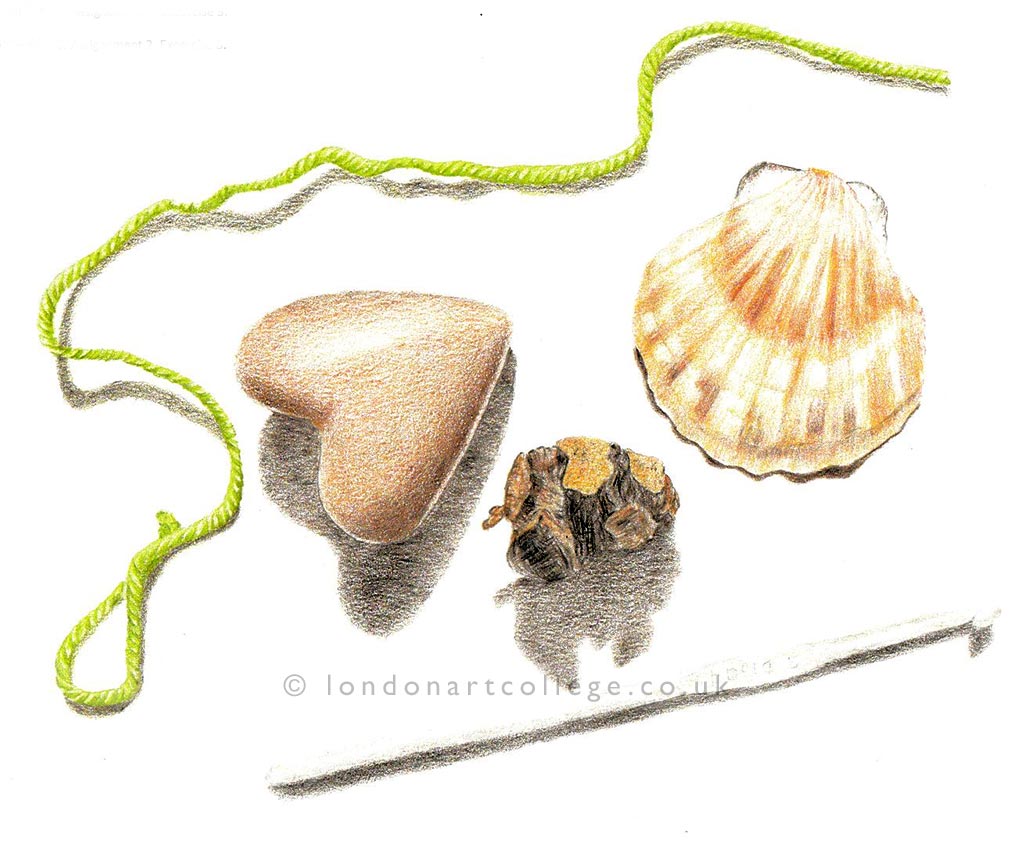
Example:
Cecilia Sandberg layered Polychromos pencils on hot-pressed paper, her shells and thread show how soft layering builds believable texture.
Mistake 3: Not Planning Your Colour Palette
What happens:
You dive in, but your drawing ends up too bright, too grey, or disjointed.
Fix it:
Always do small test swatches on scrap paper first. Choose a limited palette of 3–5 pencils that work together, plus one neutral (like grey or cream) to soften transitions.
Bonus tip: If your drawing feels too “colourful,” lightly layer a complementary tone over it to tone it down.
Take a look at this video showing how to make easy colour charts which can be really useful during the creation of your drawings.
✂️ Mistake 4: Avoiding Backgrounds
What happens:
You draw a beautiful object floating in empty space — but the piece feels unfinished.
Fix it:
Even a soft background or light shadow helps anchor your subject. Try a pale neutral, a blurred gradient, or just lightly fade the scene out.
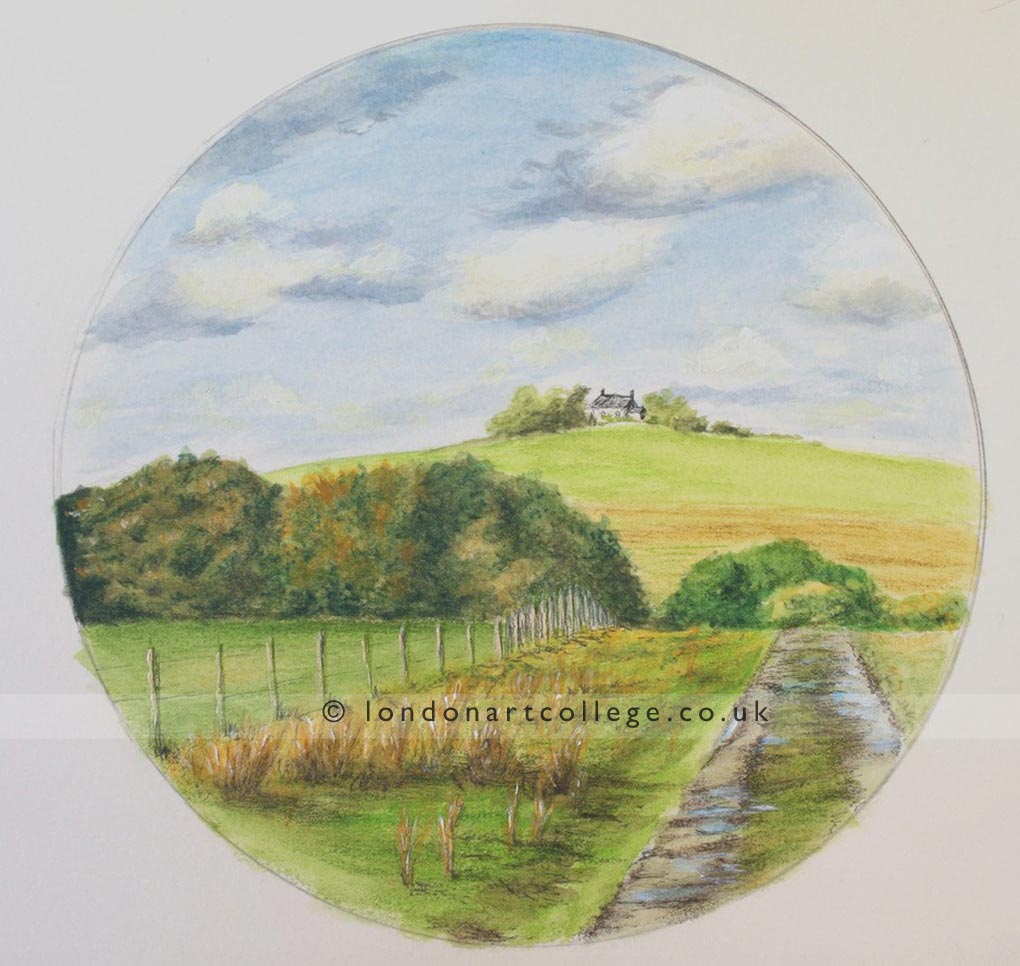
Example:
Look at how Rita used suggestion of background in her landscape, not too busy, but has a focal point for the eye to travel to.
Mistake 5: Ignoring Paper + Pencil Compatibility
What happens:
Your pencils don’t blend. They feel scratchy. Colours look flat. You wonder if it’s you.
Fix it:
It’s not just you. Paper matters. We recommend trying:
- Hot-pressed watercolour paper for smooth layering
- Bristol or mixed media for crisp detail
- Avoid sketch paper for final pieces
Popular pencils like Polychromos, Derwent Lightfast, and Luminance each behave slightly differently — test combos until you find what feels right.
Bonus Tip: Scan or Photograph Your Work for Perspective
Sometimes it’s hard to see where your drawing needs a boost until you look at it in a different format. Try scanning or photographing it and viewing it on screen, areas that need adjusting often jump out.
Want to Learn Properly with a Tutor?
If you’re loving coloured pencil but feel unsure how to improve, our Coloured Pencil Drawing Certificate Course is here to help.
It’s completely online and self-paced, with structured lessons, gentle feedback, and real tutor guidance. No shortcuts, just practical skill-building at your own speed. Join beginners and improvers from all over the world learning how to draw in layers, build colour and find their own artistic style.
If you would like to receive a roundup of all of our blog posts once a week to keep you inspired in your inbox, why not sign up to our newsletter. You can access our sign up at the top of our page. If you are a London Art College student and you would like your artwork featured here, drop us a line at any time.
1 thought on “Coloured Pencil Drawing Techniques: 5 Beginner Mistakes and How to Fix Them”